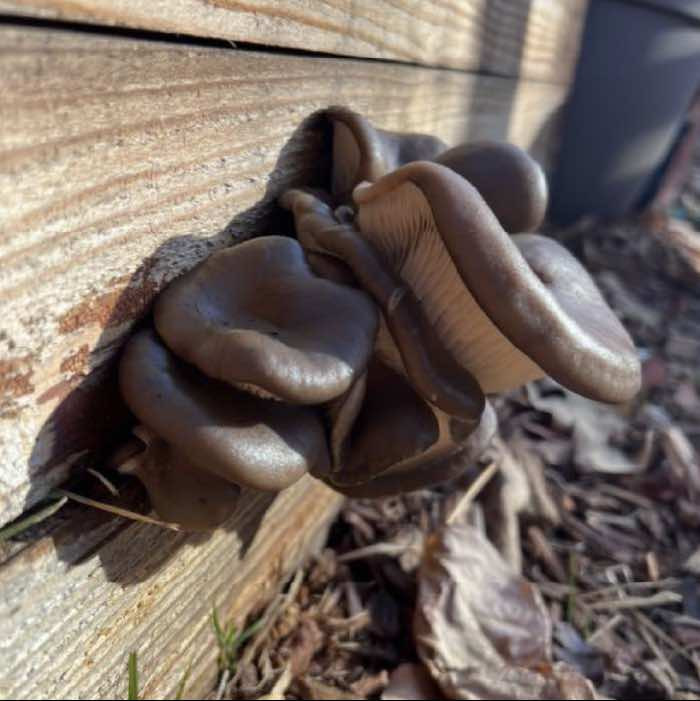
Over the years we've gotten many questions on how to properly incorporate mushrooms into a hugelkultur bed or mound. While we've always had a grasp on the idea of hugelkultur and how it may work with mushrooms we never truly experimented with it. However, we're fortunate enough to have Tobie K. from Sacramento in our court to share a wealth of knowledge! Continue reading the guest blog below to learn about how to use mushrooms in your hugelkultur.
What is Hugelkultur?
Hugelkultur (raised beds with aged decomposing wood in the center) is a low-water, cost saving permaculture gardening method that's an excellent way to grow mushrooms alongside vegetables in a wide range of climates.
Using Mushrooms in Hugelkultur
1. Examine your climate
My hugelkultur beds started in 2020 as a way to dispose of many aged Ailanthus altissima (incredibly invasive Tree of Heaven) logs and stumps that were left by previous owners, to save money by buying less soil to fill my raised beds, and to experiment with seeing what backyard mushrooms would grow in Sacramento, CA. We get virtually no rain from about April-October and have daily highs in the 90s and 100s for many months. Even though my beds only receive irrigation 1-2 times a week maximum during our dry season and are in full sun, my Grey Dove Pleurotus ostreatus has produced multiple flushes throughout spring, winter, and fall every year.
2. Building your base
Start by building a raised bed frame using insect and decay resistant untreated wood. I used 1-inch redwood fence-boards as I only intend these raised bed frames to last ~5 years, if your intention is for these to be permanent I recommend 2-inch redwood or cedar. Gather your "filler" materials, and think about replicating what's actually on the forest floor in nature. I used a mix of large and small wood (Field & Forest has this great guide so you can make sure to use a wood that oyster mushrooms grow on), dried leaves, unfinished compost, and store bought soil and earthworm castings. Starting with the largest pieces of wood, fill your wooden frame about ⅓ full with your filler wood. Liberally cover everything with a layer of well broken up sawdust spawn, and then add additional smaller pieces of wood and repeat. Make sure to work the spawn into the gaps between pieces of wood. Then add a layer of dried leaves or other small dried "browns" mixed with either finished or unfinished compost, and finally top with at least 6 inches of garden soil.

I topped with rice straw mulch, as I'm also using these beds to grow Wine Caps Stropharia rugoso-annulata and mulch is necessary to conserve soil moisture in our hot dry season. (The chicken wire cage is to keep squirrels from digging everything up while the mycelium is colonizing).

3. Maintaining and Monitoring
Keep the bed damp until the mycelium has had a chance to run, but you can go ahead and plant other vegetables in it right away. I built the beds in fall so rain would help provide most of the moisture needed, got my first flush in spring, and have had multiple fruitings since then. Since the beds are in full sun, I built them east to west so that there would be a long side that provided its own shade, and while the mushrooms have only fruited on that shady north side this may not be necessary in cooler less sunny climates.
4. Harvest Mushrooms!
Flushes first appear as pins through small gaps between boards, and develop over a few weeks. These beds grow tomatoes, peas, peppers, eggplants, beans, flowers, and herbs. They receive no additional irrigation during our wet season from November-March, 1x a week deep watering during the rest of the year unless we're having a stretch of multiple days over 100°, in which case they're watered twice. Add Wine Cap sawdust spawn while doing your straw mulch layer and you can have mushrooms across multiple seasons that come back year after year.


